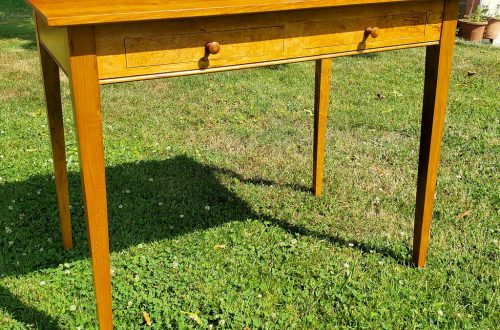
Hall Table Almost Finished
I just lost this entire entry because I’m dumb sometimes. ARGH. Here we go again….
Today was a good shop day. The hall table is almost ready for finishing. Today was drawer day, and fortunately, I didn’t do anything as stupid as I did just a few minutes ago when I lost this entry. 🙂
First up for today was to dimension all of the stock. The drawer fronts were already done, as I sliced them from the front rail when I was building it. The drawer sides and back are maple. I had 3/4″ maple stock that was about 5-1/2″ wide. It had to become 1/2″ thick for the sides and back. The first step was rough length cuts with the jigsaw so that the pieces were manageable. Then I set up the planer to shave 1/4″ from the boards. After everything was an even 1/2″ thick, I jointed one edge, then ripped everything to 2-3/8″ width pieces. Each of the three drawer fronts was ever so slightly different in size (the front rail had a little reaction wood in it, and I had to restart the operation to slice-out the drawer fronts once because the cut closed-up on me), so I decided to first cut the parts to length. My miter gauge has a hyper-accurate stop block on it (adjustable in 1/64″ increments), so I used that to measure and then cut the backs to the exact same width as the fronts, marking each piece as I went. I then cut all of the drawer sides to the same length, as that was a fixed number. Finally, I used the drawer fronts to set up the rip fence so that I could do the final rip of each drawer’s back and sides to the exact same width as the drawer fronts. I also cut an extra back and an extra side and left them oversize, in case I made a mistake while cutting the joinery.
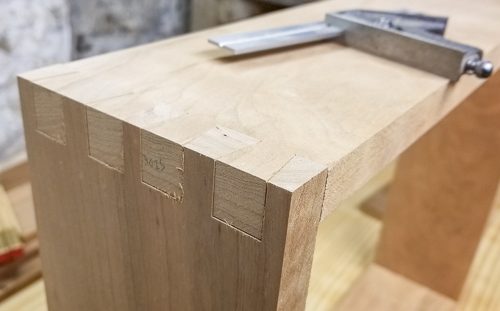
Next, I pulled out the D4R and got it set up for my first real project-related dovetails. I decided to use through dovetails on the backs, and half-blinds on the fronts. I did half-blinds on the front for Jenny’s small table, but I used the old jig and they weren’t so great. I did just a simple dado for the back of that drawer, but I decided to go ahead and do the through dovetails for these backs just as a little added fun thing to do. I wanted to cut the through dovetails first, as they were easier to do. On the D4R, the fit of through dovetails really only depends on getting the pin board right. Because of the way the pin board is cut in the jig, it is easy enough to start oversize and then slowly adjust the fit down to perfect. Added bonus is that once that perfect fit is achieved, it is easy to note in the guide and then repeat in the future. I had the mark I used on my test joints to start from, so this process would be even easier. I marked all of the parts with their respective drawer, type, and face, then got to work. On the D4R, all of the tails can be cut at once, as there really is no special set-up for those (other than getting the bit height set according to the thickness of the stock you’re using). I got that ready, and cut the tails on one end of all of the sides. I used a scrap piece to test the pin setup, just in case I had something really wrong. It worked perfectly, so I went ahead and cut all of the pins on the back pieces.
Then I got nervous, as I had to do my first half-blinds with the D4R. I knew that once I had the setup done once, I could record all of the measurements and use them next time. I hadn’t done any of them, though, so I had no good starting place. Fortunately, I knew this before I started, so I had lots of scrap of the same thickness as the fronts and sides so that I could make a bunch of test cuts and get it right. This took a little while, partially because I misunderstood one part of the setup. Once I got that fixed (the manual was quite clear–I was just not comprehending what it was telling me to do), I went ahead and first routed the tails in all of the sides, then routed the pins in the fronts. Everything fit together beautifully, though each drawer had one side that was about 1/32″ high, and one that was 1/32″ low. I’m not sure exactly what caused that, but I think it was maybe either a slight difference in stock width (though I thought I was pretty spot-on with that, given how I did it), or I was sometimes getting a hair of router waste in between the stock and the side-stop. No matter–a few swipes of a hand plane fixed the issue, and everything was fine.
I dry-fit everything and tested the drawers in their openings. I had to plane a few to fit nicely, but they’re good now. I haven’t glued them up yet because I need to cut the slots for the bottoms, then actually cut the bottom panels to fit. That will go quickly, so I’ll do that one evening this week.
The rest of the table has been glued-up and is ready to go. I need to drill the pocket holes for attaching the top, and that’s about it. I also need to sand everything, so that’ll be another evening job that is just long and messy. Then finish time, and it’ll be ready to go.
Well, it’s about time for bed. Another fun day of work tomorrow. Blah.
jonathan