A New (Old) Clothes Drying Rack
About a month ago, I got my new Saw Stop tablesaw all set up and running, and got busy on my first new project in a while. Jenny had asked for some new clothes drying racks, as the small one she had was getting pretty beat-up, and wasn’t really capable of drying larger items. A few years ago, we decided to stop using our electric dryer as much as possible. We had some drying lines in the basement, and a long one in the back yard. In the spring, summer, and early fall, we can dry a few loads in a day outside on the line, and a few extra pieces on the small rack. During the colder months, and when it is rainy, we’re left with only the lines in the basement and the small rack. With a larger drying rack, we could dry things on the porch during rainy weather, and around the house during the winter. This would provide a much-needed supplement to the lines in the basement, and also enable us to dry even more at once during the warmer months.
I had plans for a large rack and a small rack. The large rack would be capable of drying items as large as a set of queen bed linens. The small rack would be larger than the rack that we have now, and capable of drying several sweaters, shirts and similar-sized items at the same time.
I drew-up plans for both, and decided to do the small rack first. I figured this would give me a chance to test some of my techniques before getting involved with larger workpieces. I decided to use white oak for the rails, partly due to its weather resistance, and maple for the spindles. I also decided to go without a finish on this piece, as it is going to be really, really abused with moisture. I suppose we’ll have to see how well that works. Given some of the unfinished oak things I’ve seen, though, I expect that it will do just fine.
For this project, I decided to learn a bit about using dividers for layout. Wow. I wish I had found these things earlier. It was so much easier to lay out the holes for the spindles using a set of dividers. I just did the layout once for each size of rail, ganged all of the same size rails, and marked them all at once. With a fence set up on the drill press, the rest was cake. Using dividers made dividing the length into even segments a breeze (hence the name of the tool, I suppose).
Once I had the rails cut and drilled, I chose a size for the longest spindle, and then did the quick math to figure the rest of the spindle lengths. Since some of the spindles have to cross through multiple rails, the spindle lengths varied. I cut all of the spindles and did a test fit, which is when I decided which joints to fix and which to leave unfixed as pivots. I marked all of the fixed joints, flipped it on its side, and got ready for glue-up.
To assemble this piece, I decided to use glue and a crown staple on each fixed joint. I didn’t have a really good way of clamping these joints together, so I let the crown staples hold each joint while the glue set. It probably won’t hurt to have a mechanical fastener on those fixed joints, either. When it was all said and done, I added a simple quick-release strap across the top two spindles to act as a spreading stop, and we were done! The neat part about the quick-release strap is that it can stay attached even when folded, and it can be adjusted to give a wider or narrower spread, depending on the use of the rack.

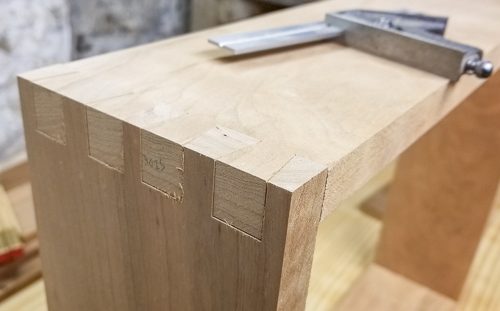
Detail of a fixed joint:

And the magic spread stop strap (webbing and quick release parts from handy dandy Ace Hardware):