A Modern “Writing” Desk
I have been fortunate to work for an employer who allows me to take one day per week to work from home. Before the Covid-19 pandemic, I used to take Friday as my work from home day. The day was often busier for me than if I was in the office, but getting to skip the commute and having some flexibility to fit in a lunchtime shopping trip or a morning appointment, or being available to sign for a package or meet with a contractor, etc., was a priceless benefit. I usually worked from the diningroom table, as it was convenient to the kitchen so I could start a more complex dinner earlier in the afternoon, get outside for a walk or to work outside on nicer days, and the like. And since it was just me and my laptop, the only infrastructure I needed was a power outlet, so it was an easy set up and easy tear down.
Since my coworkers and I enjoyed this benefit and most of us made good use of it, we were pretty much prepared to transition to full-time work from home posture with no real hiccups. However, now that this was going to be a full-time thing, I was missing the several large monitors that adorned my desk at the office, and a real keyboard, and a chair that wasn’t a dining room chair…. The keyboard and a second monitor were nabbed from my office one day when I had to go in to get a few other items that were still in my office when we were told to begin working from home. I ordered a chair (Steelcase Gesture, which I got a great deal on refurbished, and is a supremely comfortable chair). Jenny liked it, so I ordered one for her, too. I cleaned off the small writing desk in the dining room so that Jenny would have a secondary place to work and put her work stuff at the end of the day. But I was still at the diningroom table, now with a second monitor and a keyboard. This was sub-optimal.
I was just finishing the medicine chest, and finding that I was enjoying some shop time again. I started sketching some ideas for a desk that would fit into a corner of our living room, where a writing desk may have been in days of old. I was thinking about construction, and how the last small tables I’ve made (hall table (photo link there broken–sorry, I’ll have to find that photo and fix it) and small side table (apparently I never posted about this) used traditional mortise-and-tenon joinery for the legs and aprons. This yields a supremely stable and strong base, but it takes some time to do and must be accounted for when figuring dimensions for stock.
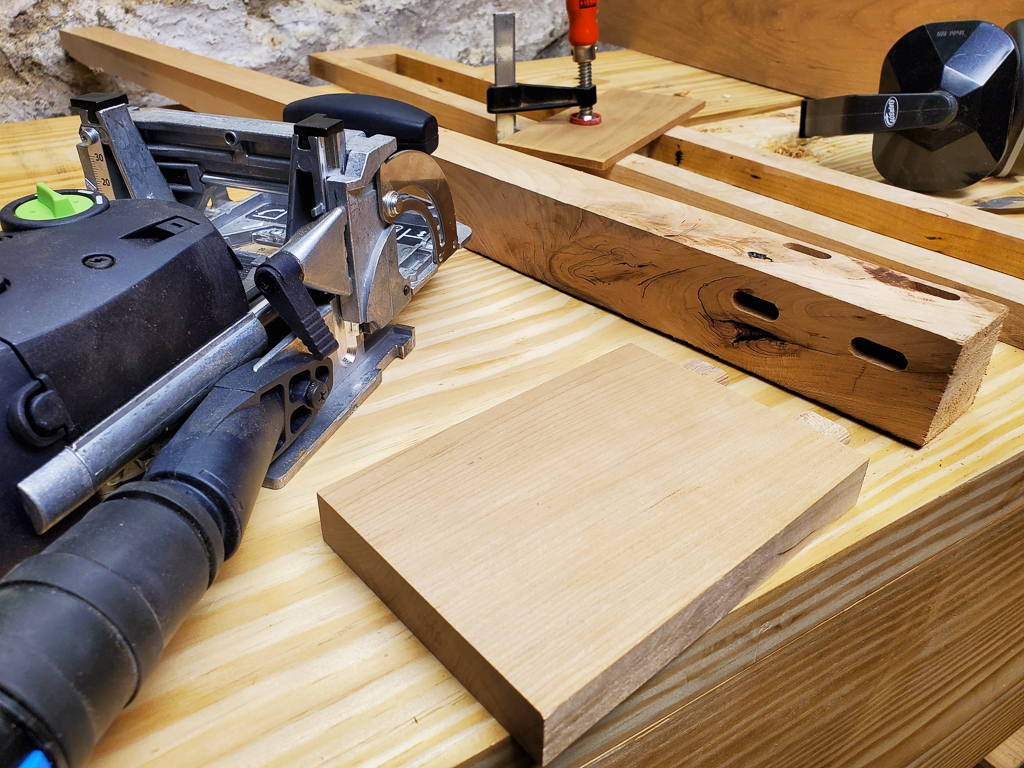
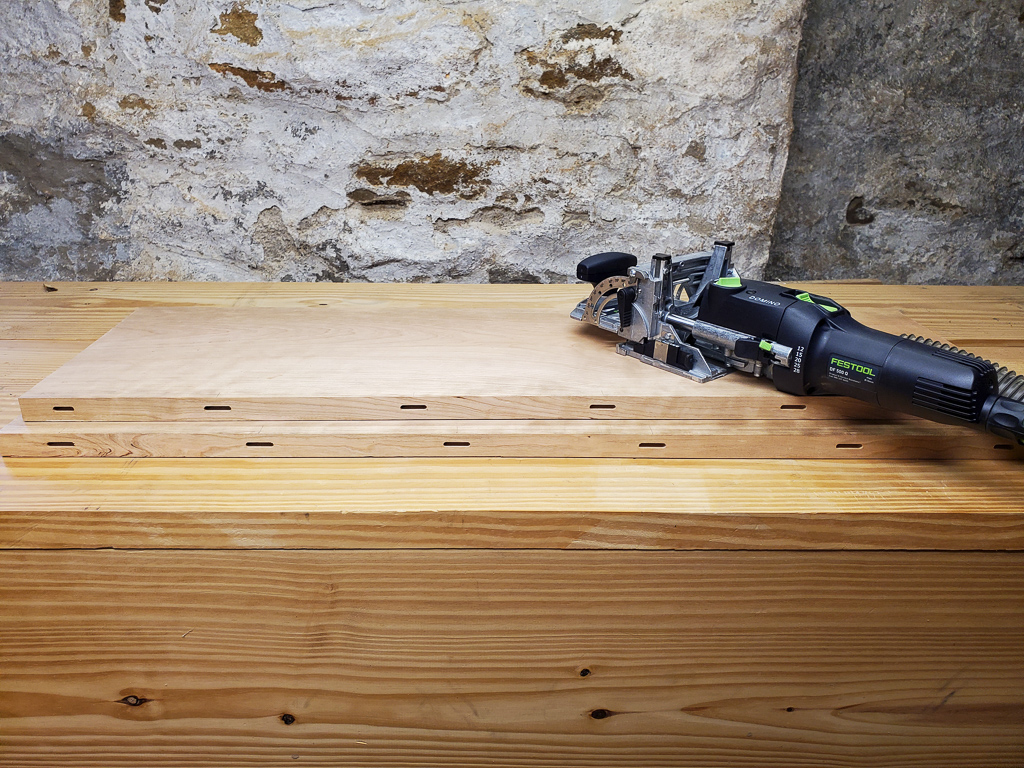
I was also thinking about the work that a wide panel glue-up for a table top or chest side would create, with the additional clamping to try to keep everything even, and the follow-on leveling with planes and scrapers to try to make a flat surface where boards met. I was thinking about getting a biscuit joiner to help with panel glue-ups, and I decided to jump in with both feet and pick up a Festool Domino, which is a tool designed to create accurate mortises for loose-tenon joinery.
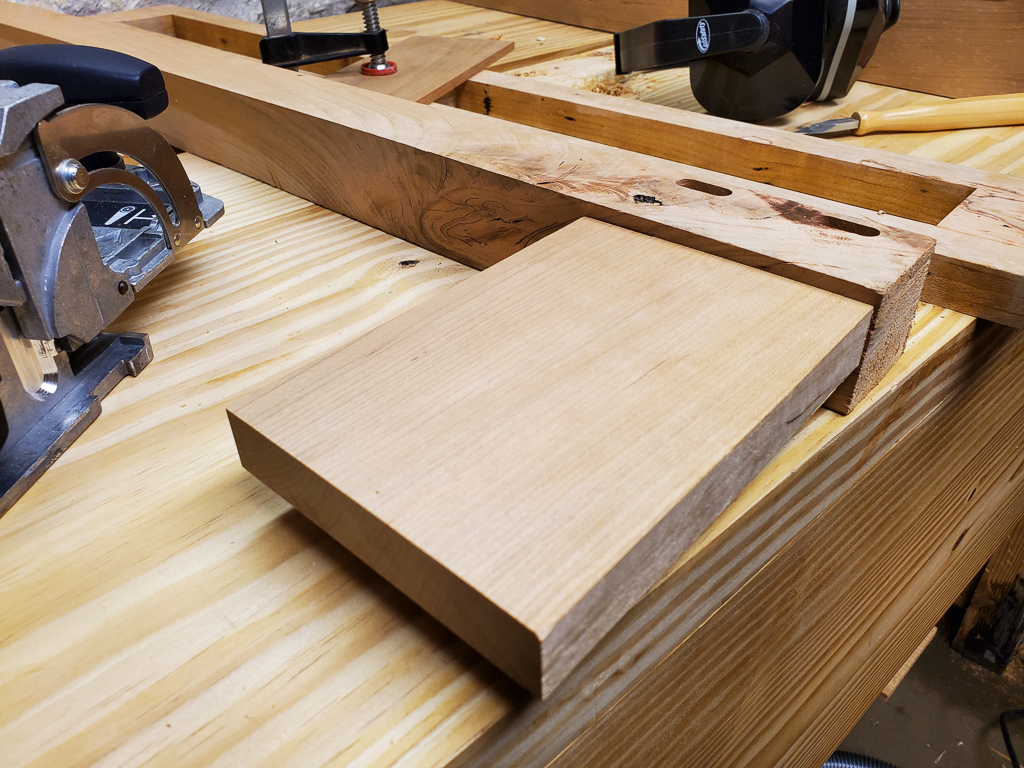
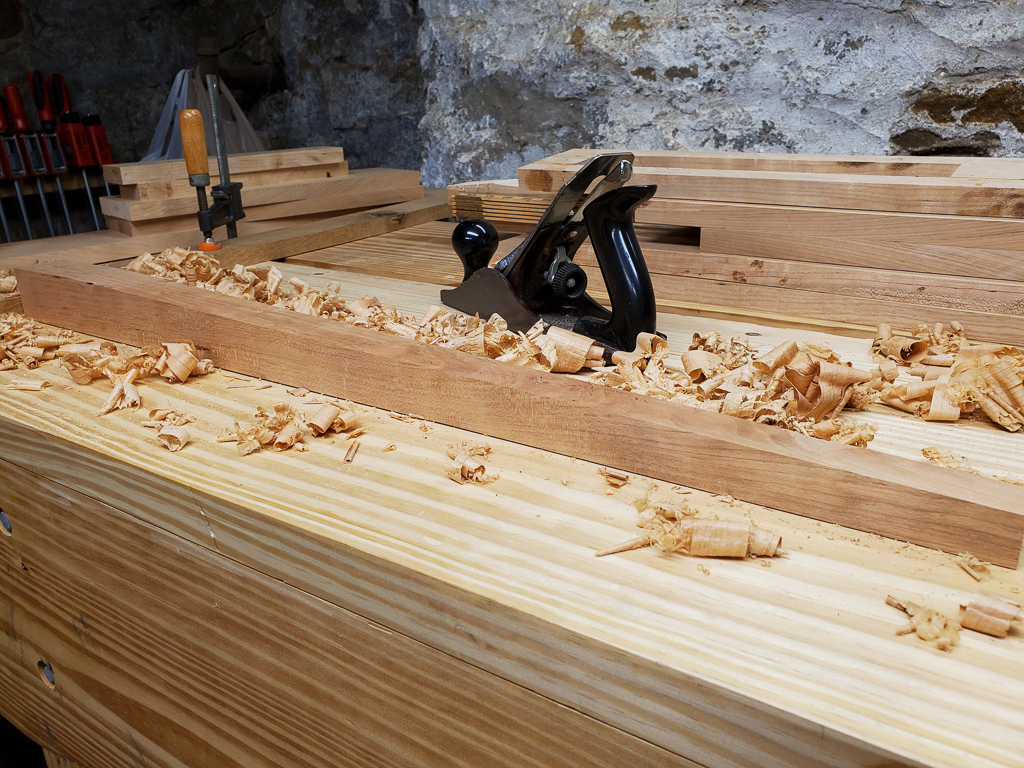
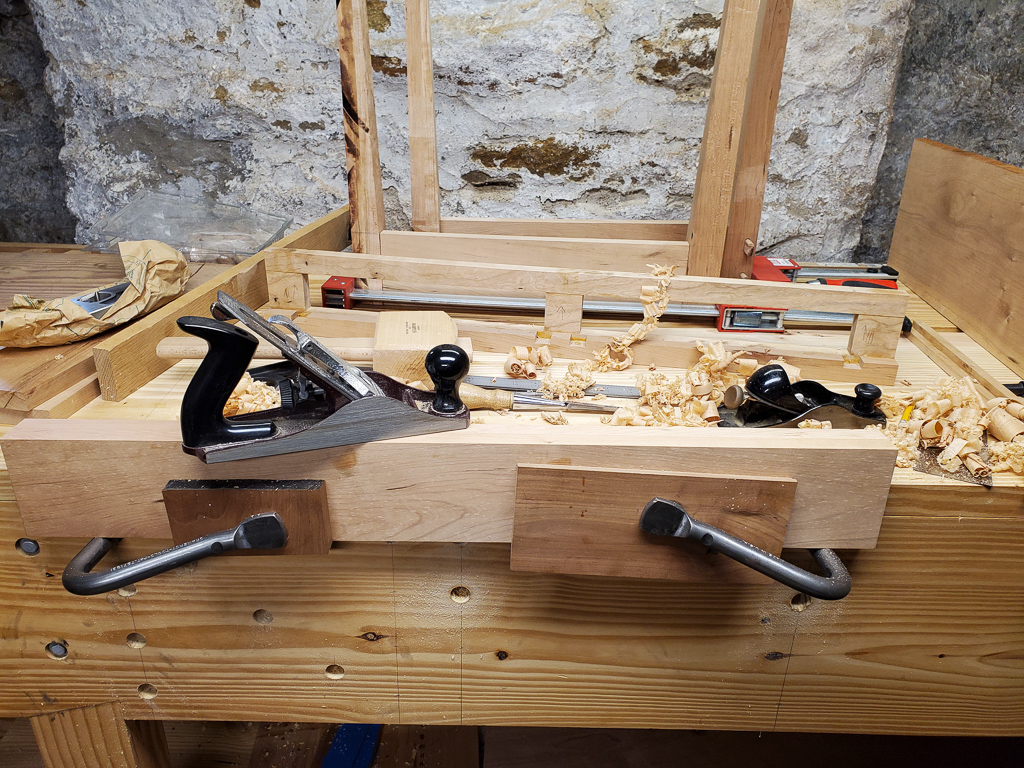
The Domino has been a bit of a revolution for furnature builders. The idea of loose tenons goes back to ancient times. Instead of forming a tenon on one piece that fits into a mortise cut into another piece, both pieces have mortises cut in them, and then a loose piece of wood designed to fit into both mortises is glued in place. In this mode, the Domino replaces several operations for me, which would have included cutting the mortise on a table leg, then rough cutting and fine tuning the tenon on the mating apron, test fitting several times to make sure I got a nice tight joint. Though I have a square-chisel mortising machine to make the mortising operation faster, and I can rough cut the tenons using the tablesaw or bandsaw, there is still a decent amount of work needed to create each joint. With the Domino, I can cut the mortises for an apron and leg joint in maybe a minute or two, and that’s moving slowly to make sure I’m on my mark and double checking my work. The result is a repeatable, perfectly-fit joint, with no extra figuring required to make sure that edge reveals are accommodated and alignment is good.
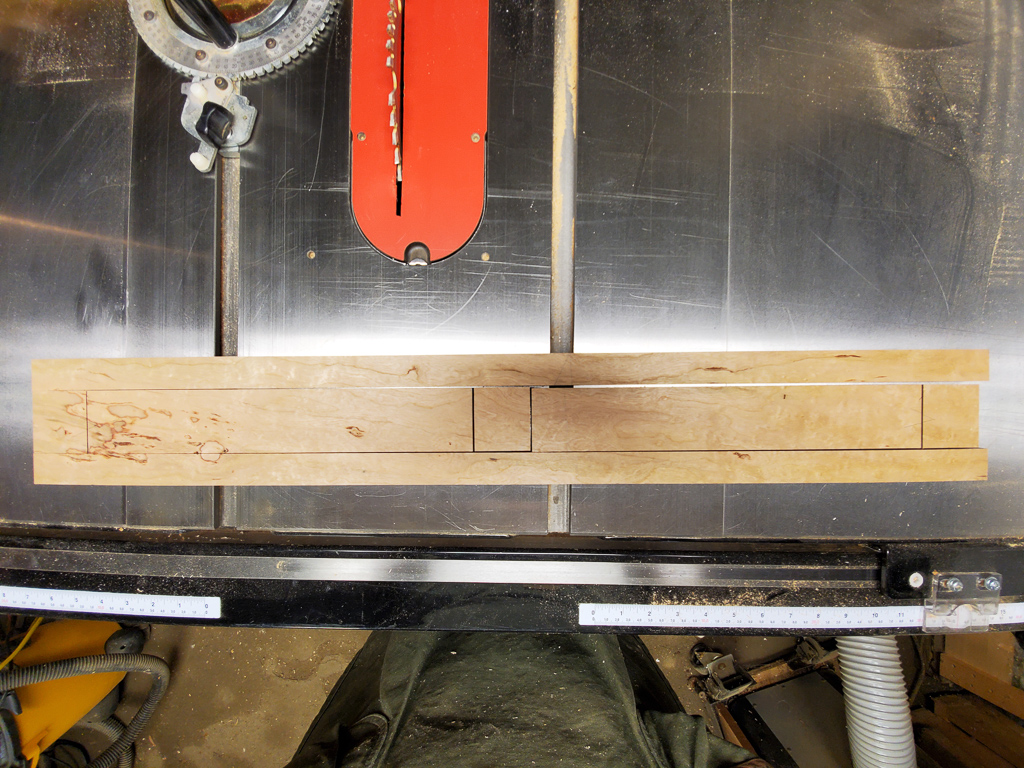
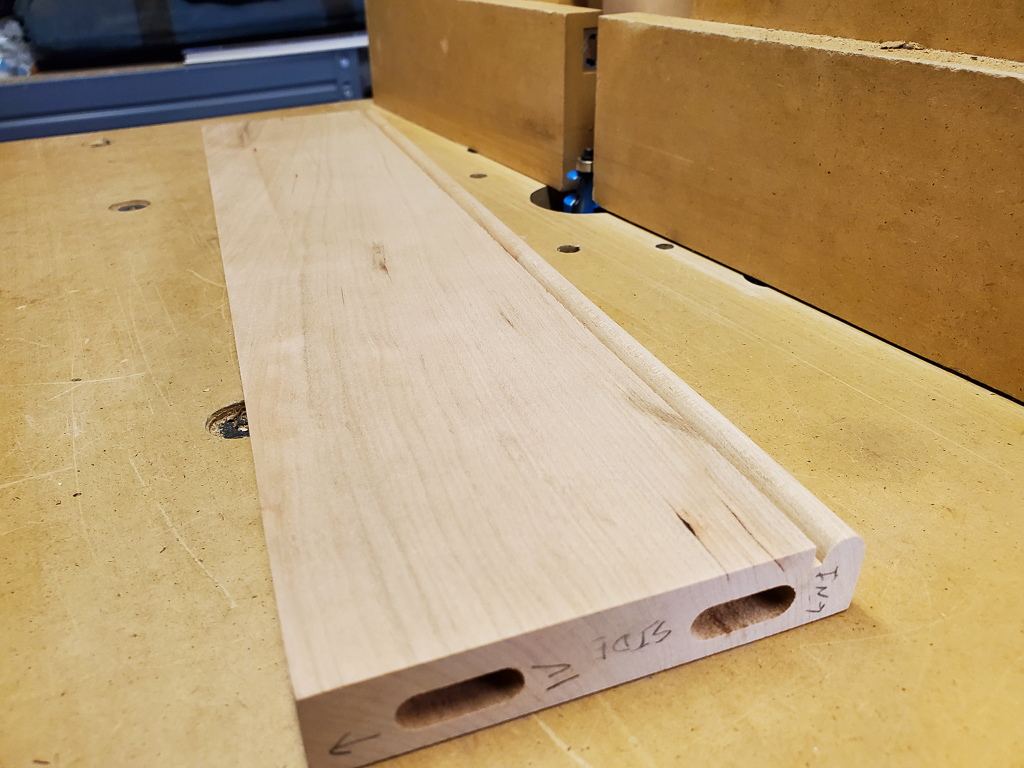
This project started with the top. I had to work to some specific minimum and maximum dimensions to fit into the space I had and also to hold the laptop, monitor, and associated stuff that are the tools and accessories of a modern “writer.” I had some nice, wide Pennsylvania cherry in my small pile of stock. I had pulled a board that was about 11″ wide, and hoped to get both pieces for the top from that board. Sadly, that was not to be, as there was sapwood that crept in on the edges in a few spots, and not in a way I could use as an accent. So I grabbed another board, this one 12″ wide and with some rather interesting figure on one end. I decided to use the intersting figure for the front apron.
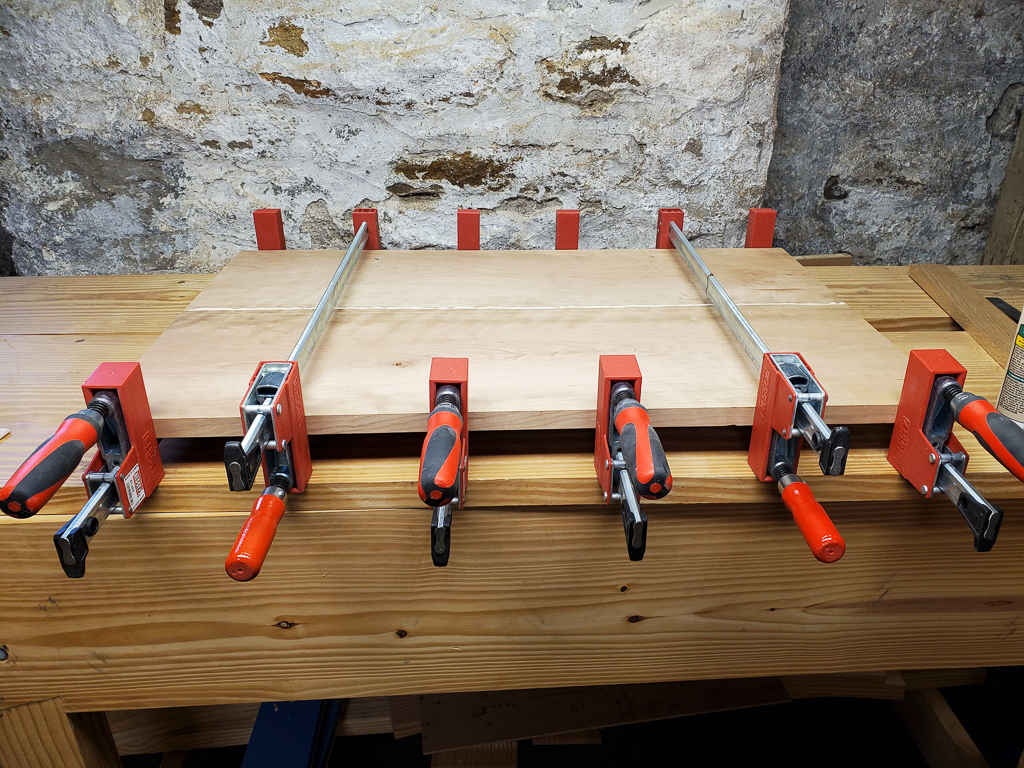
A chunk from the 11″ board and one from the 12″ board formed the top. Another use of the Domino is for edge-joining boards, using the loose tenons to keep the top flat during glue up. This was rather amazing, as I had to do almost nothing after the glue had set, other than to peel off the excess.
The remainder of the 12″ board gave me the parts for the aprons and some interior components. A chunk of 12/4 cherry got me two front legs, and I had enough stock that had a pretty good grain match to glue up parts to form the back two legs.
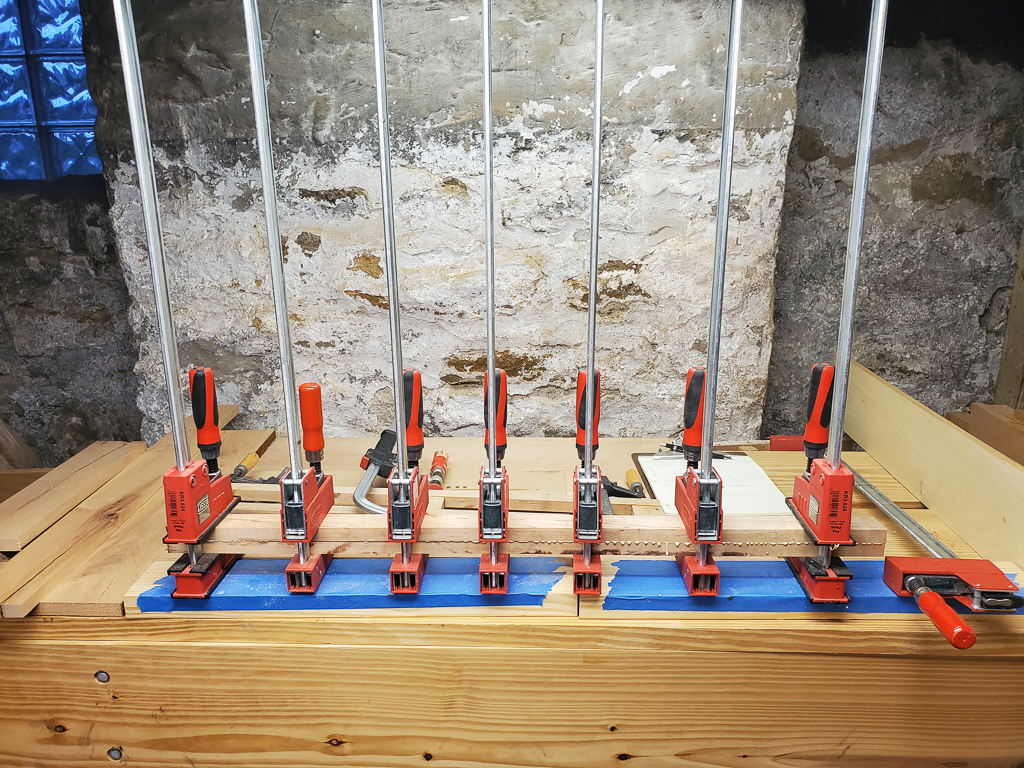
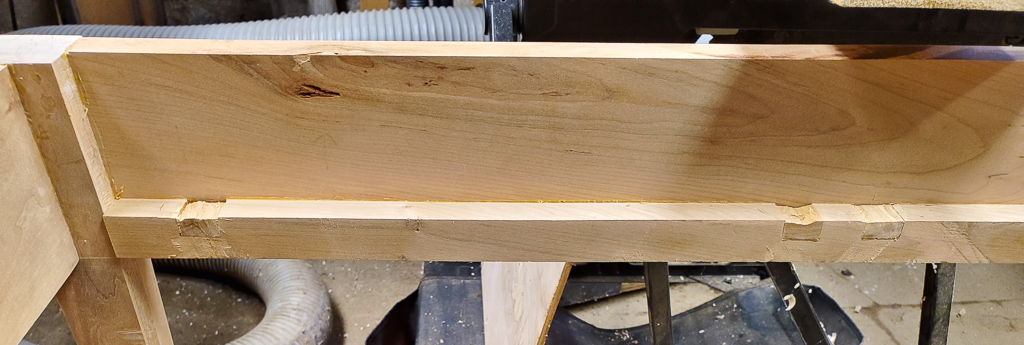
On the front hall table I made a bunch of years ago, I used a technique I had read about where the front apron is ripped to cut free the drawer fronts, then the apron pieces are glued back together, resulting in a perfect grain match the whole way across the apron. After making some layout marks, I ripped the top and bottom from the board, and then cut the drawer fronts to length from the center section.
I used the Domino to cut mortises between the top and bottom rail and the three middle pieces surrounding the drawer fronts, then glued the whole thing together. Here is where I found a problem with my technique on the Domino: The front rail pieces weren’t all flush. They were only out by maybe 1/32″, so they were easy to clean up with a plane. I figured out my issue (I should have elevated the small pieces off of the bench so that the tool registered consistently off of the top face), but I wasn’t going to re-make this part. I planed the high parts flush and we were good to go.
The legs are tapered on the inside faces, Shaker-style. I marked the tapers and cut them on the bandsaw, then cleaned up the saw marks with a plane. When I did this for the hall table, I used the power jointer to clean up the saw marks. That was much faster, but I hadn’t taken enough care to give adequate room between the end of the taper cut and where the bottom of the apron would sit. An astue observer of that table will notice an ever so slight gap at the bottom of most of the aprons as a result. Using a handplane here let me move more slowly, sneaking up on my mark, taking heavier or lighter cuts where necessary to clean up the leg but still keep to my marks.
I should add here that I finally finished assembling the top to my workbench as I was finishing the medicine chest, and it was a revelation to finally have a solid work surface that I could use to plane, cut, chop, drill, and fit parts. I have never had a true bench. I worked off of Black and Decker Workmates forever. Bigger projects would have me pull out a couple of saw horses and set up the project on them. A real bench is amazing.
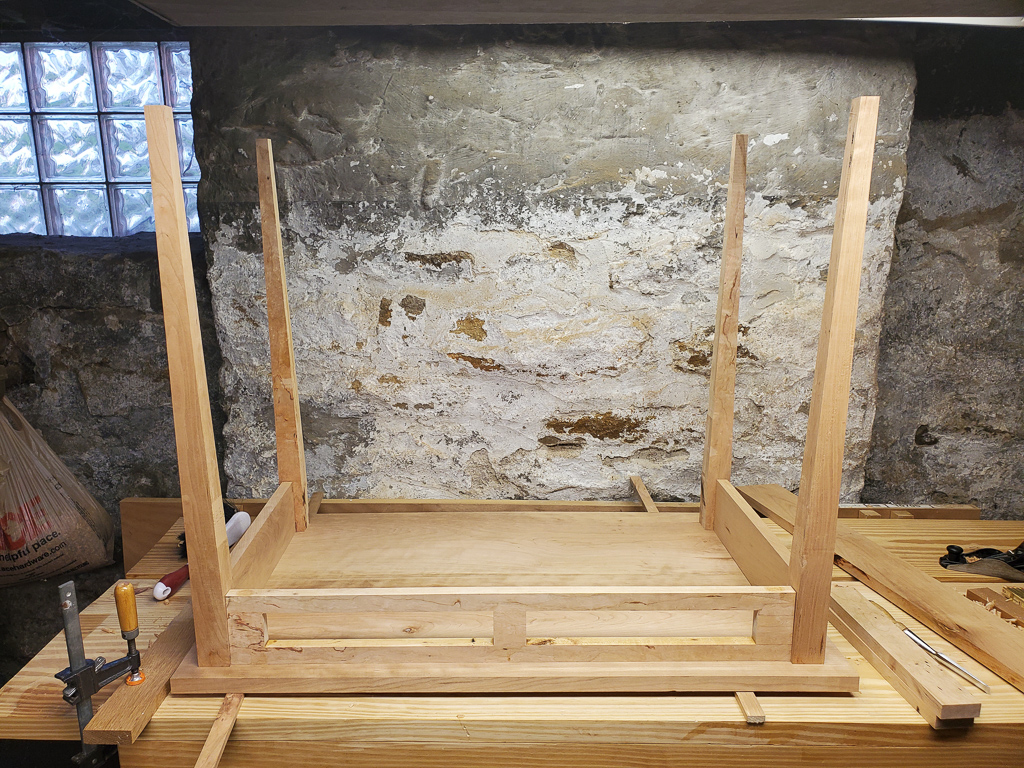
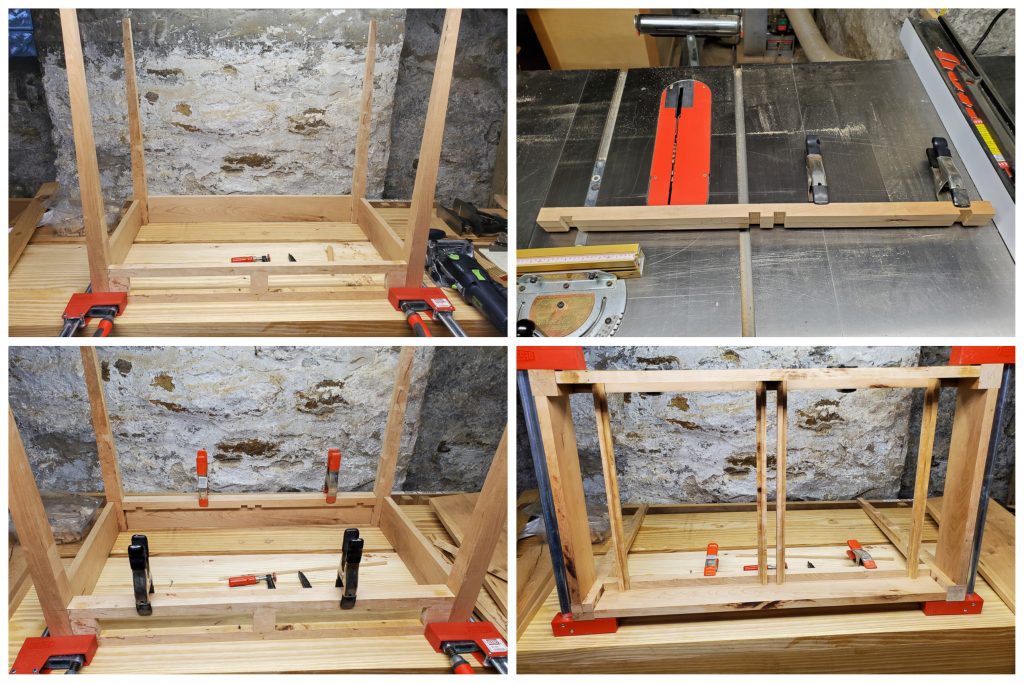
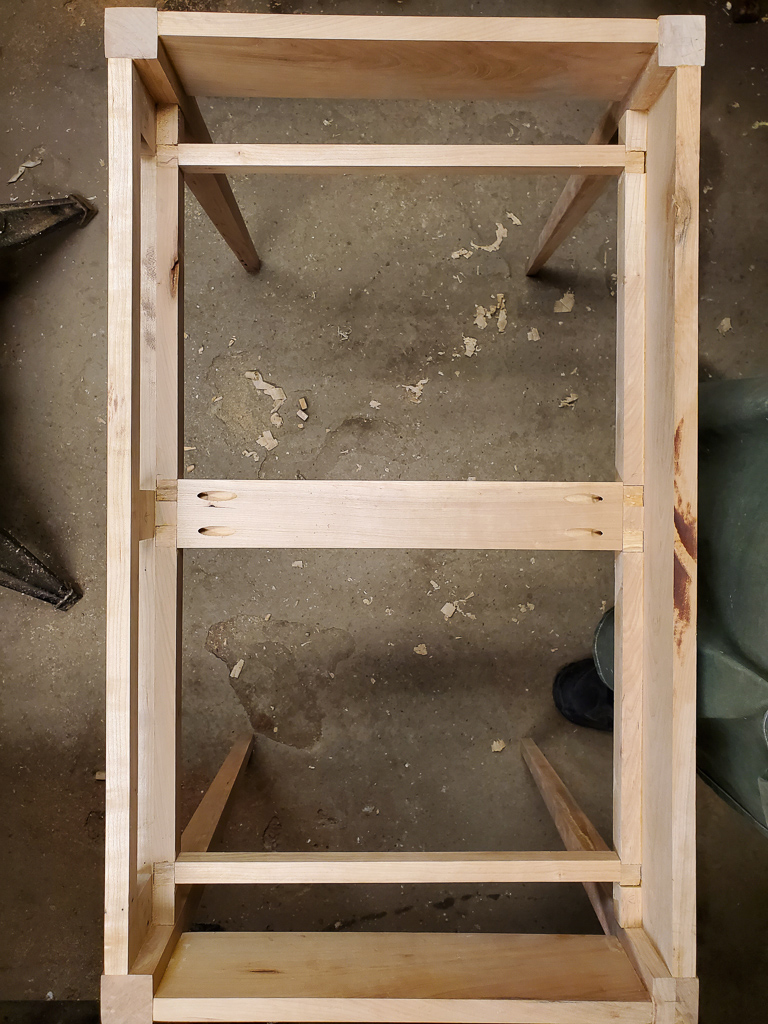
After getting the legs cleaned up, I did a quick fit upside-down on the top panel to make sure the basic dimensions were all good to go and that the scale of everything was correct, then I set to cutting the joinery with the Domino. It took longer for me to mark all of the parts than it did to actually cut the joinery. It was maybe 15 minutes to cut all of the joinery for the base. Amazing.
I decided to use the same technique I had used on the hall table to support the drawers in this desk. Since they are small and intended for the odd notebook, pens, cable bits, and the like, I was not overly concerned with having top guides. I cut L-shaped runners from some of the leftover rips from the aprons. I then did a full dry-fit with tenons in place and the base clamped front to back so I could get the length for the runners, and mark for the runner supports that would be glued to the front and rear aprons. I used the table saw to nibble out the waste for the runners, and glued them in place. Not shown, I then glued the runners in place, after fitting them and using a shoulder plane to bring the edges into alignment with the front apron and support rail.
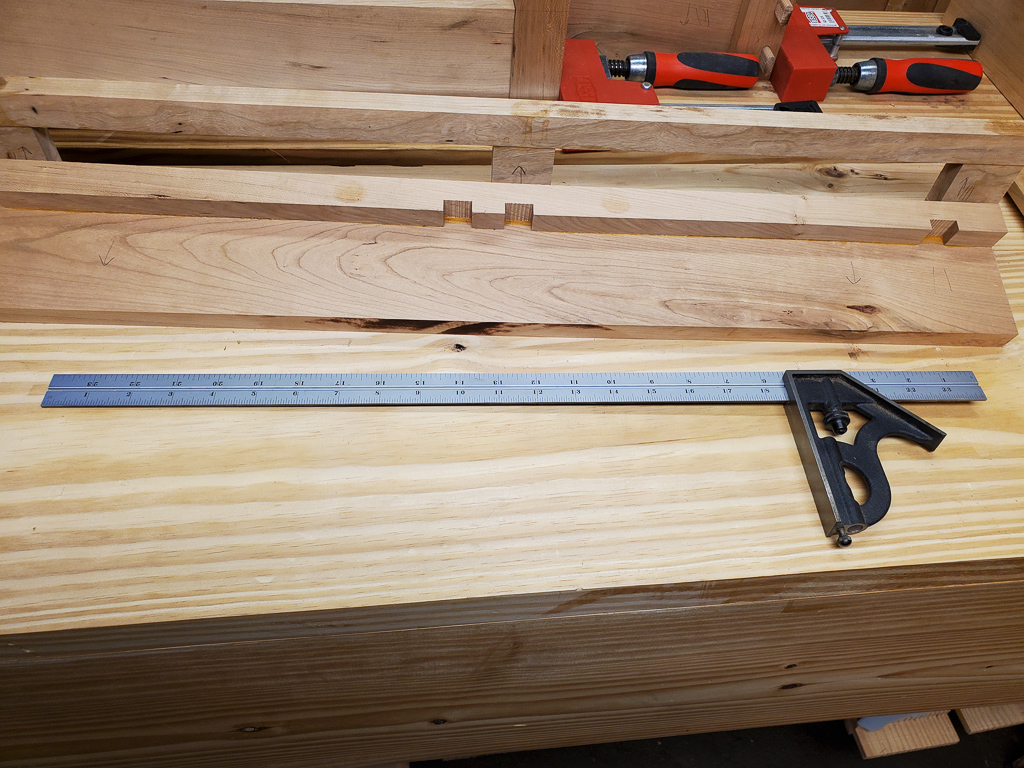
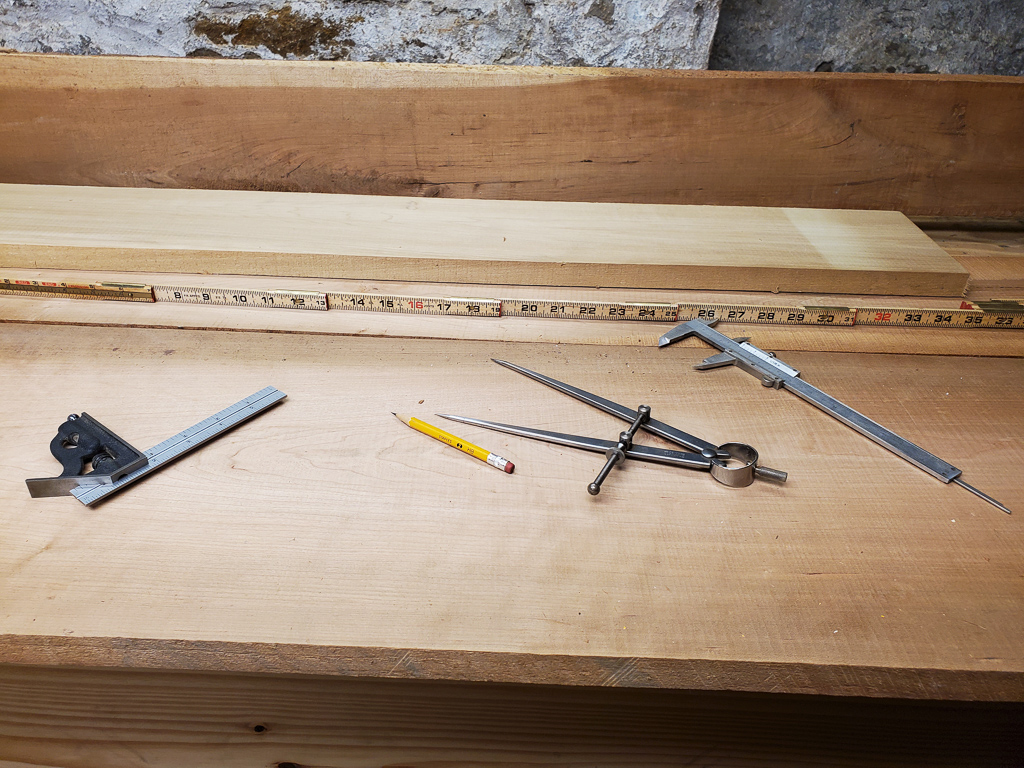
Let me just tell you how much I love the 24″ rule I have for my Starrett combination square. For cabinetmaking of any sort, this thing is amazing. After I got it, I understood why a folding 24″ rule was considered a standard part of most any cabinetmaker’s tool set.
Before gluing up the apron, I planed the bottom edges of the drawer runner supports flush, then cut a simple bead on the bottom of each rail at the router table.
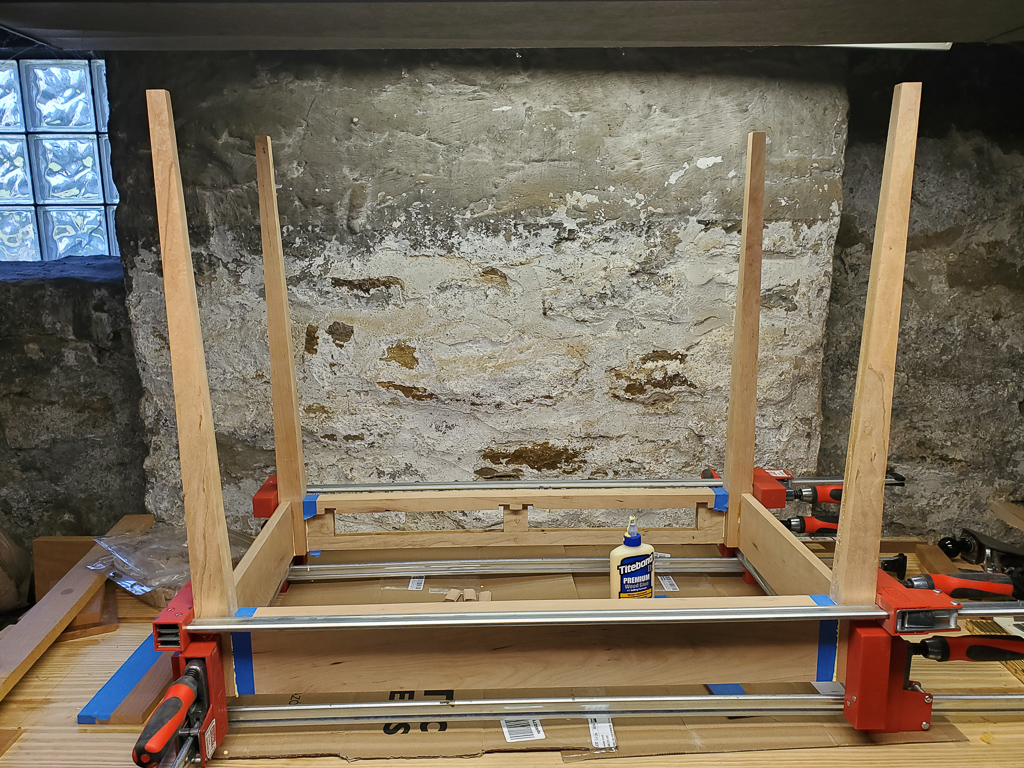
Now, finally, it was ready for glue-up!
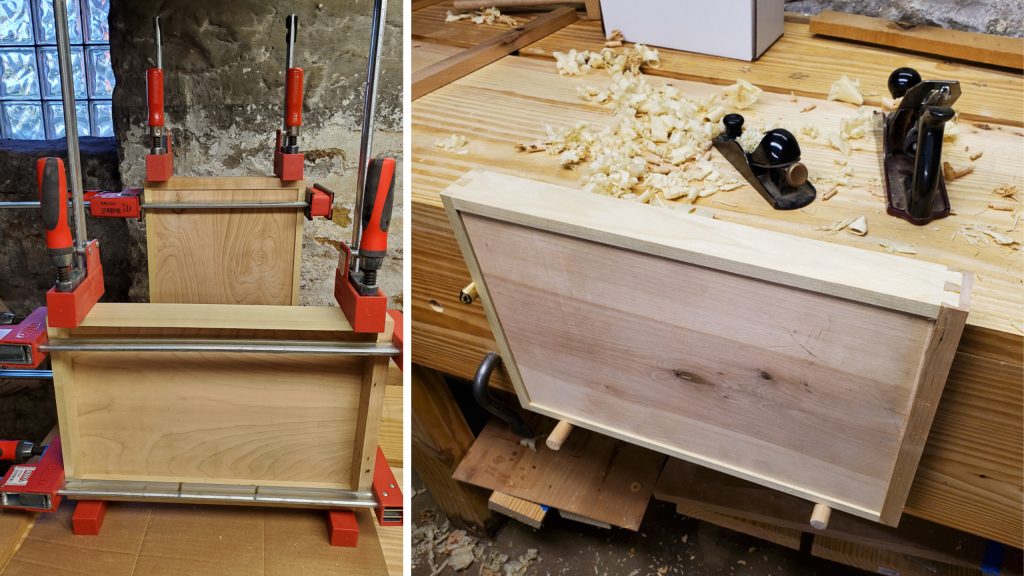
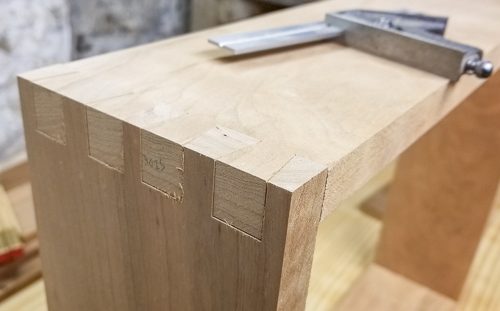
As the base set up, I worked on building the drawers. These are half-blind dovetails at the front, through dovetails at the back, with a groove cut the whole way around to capture a 1/4″ plywood bottom. These drawers are pretty shallow, so I cheated the bottom close to the bottom of the drawer box. I’m not too worried about strength as these should never really hold a lot of weight. After getting them glued up, I planed the joinery flush and then planed them to fit the openings.
I was having trouble getting the drawers to run smoothly, as it seemed like the runners were not aligned correctly front to back. What the heck. Pull out the square, check it… yeah, they’re out. By a good bit. I take my widest chisel and pare back the pinch points at the rear. The drawers now work but they have a good bit of play side to side as they run in and out. OK, this desk is just for me, it’ll do. I was getting tired on this particular day, so I closed up the shop and called it a night. Rain kept me out for a little while. Every night when I couldn’t work in the shop, this ground at me. Finally, one night, I decided that was it–as soon as I could get back to work in the shop, I was going to take action.
That pained me so much, but it was the right thing to do. I was cursing at myself at this point for not building a nice bottom frame, especially since the Domino would have made it a cinch. Fortunately, pocket screws to the rescue, and new flat runners were installed between the front and back supports. I drilled the holes for the far side runners on the outside edges, where they were unlikely to be seen easily. The middle support I drilled from the top, and they would be covered by strips I would glue on top as runners for the drawers. I discovered that the problem was that I had flipped one of the support pieces around before I glued it in, so while the center runners were close and just off by a little bit left-to-right, the outside runners were way out. Whoops.
I installed traditional trapezoidal drawer stops on the front support rail. These ensured a perfectly flush drawer front every time. The now-correctly-aligned runners meant the drawers moved straight and true in and out. Win.
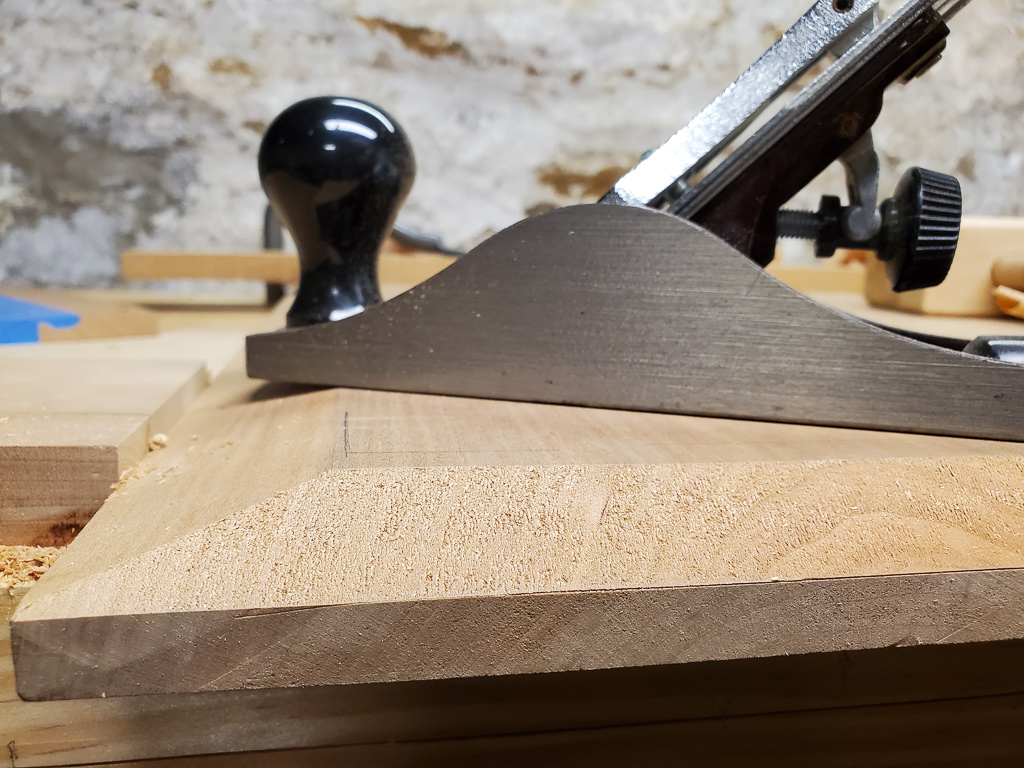
I decided to apply a wide bevel to the underside of the top, taking it to about 1/2″ thick at the outside edge. This is another detail that was traditional on some Shaker furniture. Most of my other tables have a routed top edge detail (roundover with a bead and ovolo). This looks nice but it is not super friendly to have arms laid across it for long periods of time, and it cuts down a bit on the usable top surface of the piece. The underside bevel keeps the top at full size while helping to reduce its visual weight a little. I eased the top edges with a couple of passes with a block plane. You can see the marking gauge mark in this photo that showed me how far down I needed to plane. I set the bevel angle by hand while planing. After a reasonable size flat surface was made, it was easy to keep the plane balanced on it so the bevel is straight front to back. I did the last two passes at a much more shallow cut depth and with the plane skewed just a bit, which yielded a glassy smooth surface, even on the end grain.
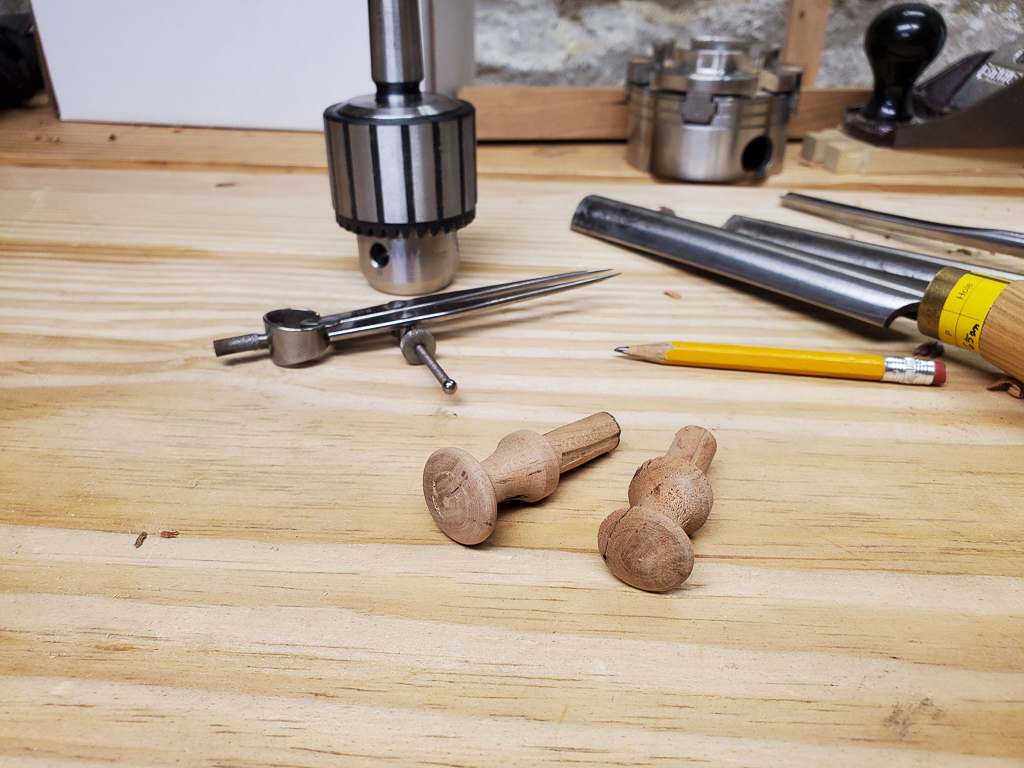
The last bit of woodwork I needed to do was to turn two drawer pulls. You would laugh if I told you how long this took me. I was rusty with all of my woodworking skills, but I was exceptionally rusty at my lathe work. I made a lot of shavings and a lot of round-ish firewood, but finally, with scary sharp tools and a lot of practice under my belt, I was able to get several drawer pulls turned from some of the offcuts from the legs. They’re not perfect (this photo is before I remounted them in the chuck for sanding), but they will work!
Finally, it was time for some finish and assembly! Several thin coats of garnet shellac, mixed from flakes, then buffed out and waxed. So pretty.
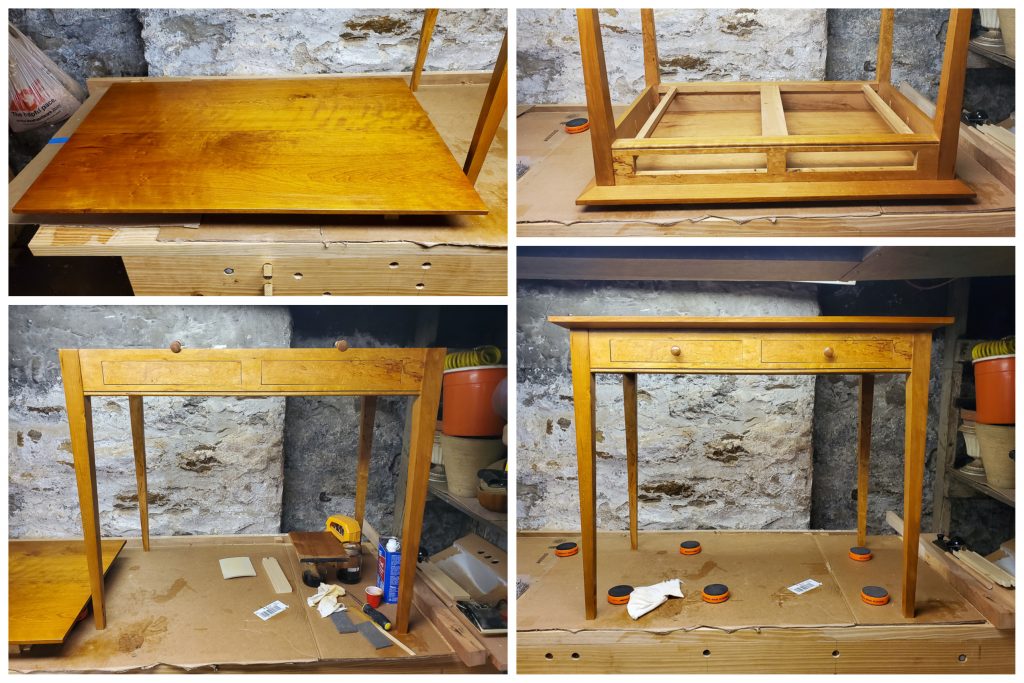
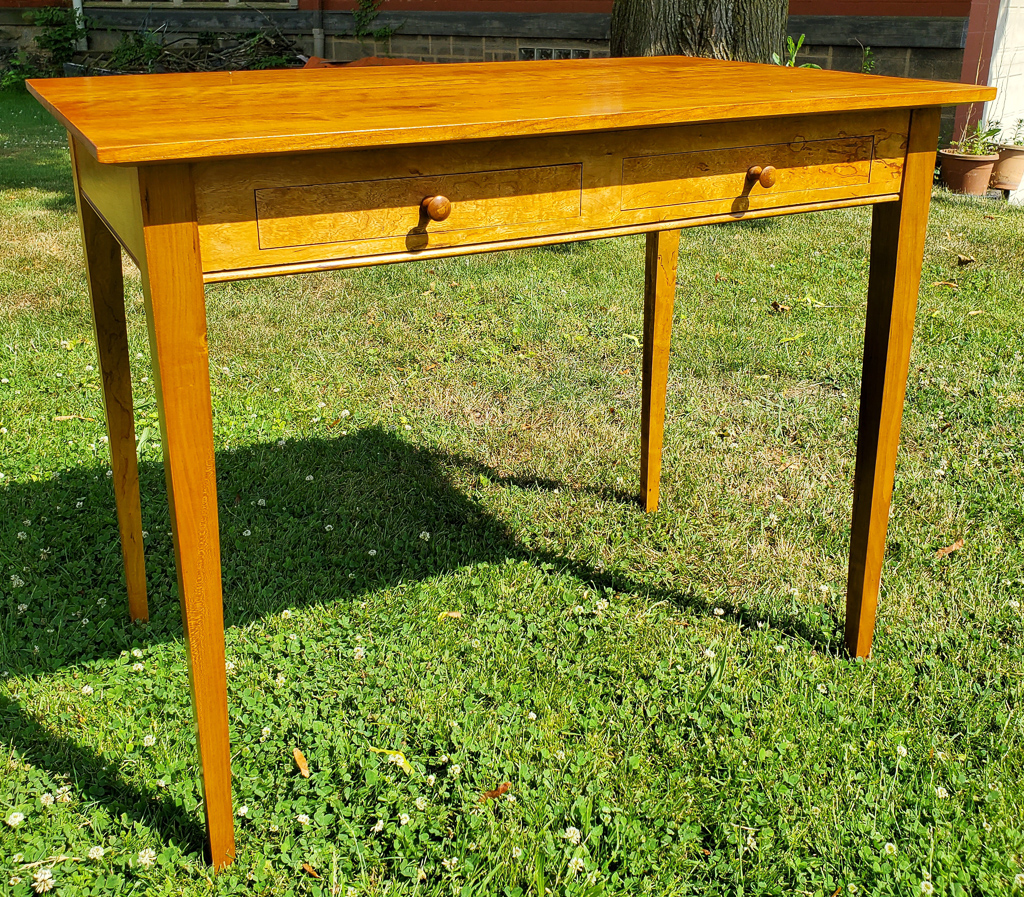
It was actually easier to take it into the house via the outside stairs from the basement. It was beautifully sunny on the day I finished it, so I took this photo before moving it inside. Ironically, we had a big thunderstorm roll in shortly after I took it inside.
And that’s it. Now we have a modern “writer’s” desk in our living room, in what was likely a traditional area for one near a window for natural light. And I finally have a place to work that isn’t the diningroom table. It has proven to be comfortable and just as utilitarian as I needed it to be, while still fitting into our old house pretty well.
Thanks for following along. More projects are going down on paper as I write this, so maybe I’ll have some other interesting builds this year!


One Comment
Pingback: