A New Medicine Chest
I have to admit that our first-floor powder room has bothered me since I bought our house (before there even was a “we”). It felt… oddly placed, off of the kitchen, behind a door partially blocked by the stove. There was a strange open storage area enclosed by some bifold doors inside, and a door that opened to the basement stairs. The room was kind of cavernous for a powder room. The storage had a main area behind the bifold doors, and a sort-of loft above it. In the corner nearest the door was the toilet, and on the adjacent wall next to the basement door was the sink. And the entire room was covered in that awful 1970’s-style dark fake wood paneling. One day, while Jenny was away visiting her family for what I thought was the whole weekend, I decided to tear into the room and rip out all of the paneling. I really wanted to know what was under it (I had my suspicions). The paneling gave up easily enough, the adhesive long ago drying out. The shutoffs on the water lines for the sink had seized. OK, new shutoffs. The crappy vanity fell apart when I tried to remove it. OK, so we’ll need a new cabinet. The sink fittings were seized, too, and the sink cracked while I was trying to remove them. OK, new sink. The bifold doors fell apart. OK, new doors. You get the picture at this point. The only thing that survived was the toilet. Early that evening, with me covered in dust and bits of broken paneling, I get a call from Jenny, who says she is just leaving and will be home in a little while. Uh, honey, I have a BIG surprise for you. Just wait until you see it….
So we renovated the powder room. My suspicions were confirmed–it used to be a butler’s pantry, and it used to open to the front hall. Oh, how I wish it was still a pantry, and how I wish it still opened to the front hall. I’d even forget the opening to the front hall if it meant I had a real butler’s pantry again. Alas, that reorganization was not to be just yet, as we had a baby shower for one of Jenny’s sisters we would be hosting in just a few weeks. Along with drywall to cover the battered walls and frame out the weird closet, we put in a new pedestal sink, a shelf for Jenny to put out some hand soaps, and an oval mirror. These were all from the local big-box home store because we had a deadline and this room had to be done.
The mirror had a thing where it would fall off of the wall every year or so. It used those dumb circular brackets that attached to dovetail anchors screwed into the wall. The anchors never failed but the brackets weren’t designed all that well. Over time, they would twist a little, and if I didn’t notice and tighten the set screws in time, one would eventually pop off of the dovetail bracket, and the mirror would land in the sink. Amazingly, it never broke. One of these times (actually, the last of these times), the falling mirror wrenched one of its brackets badly enough that it would require replacement. Except you can’t replace them without buying a whole new mirror. Ugh. I don’t remember when that was, but I think it was probably sometime in 2016 or 2017. Maybe.
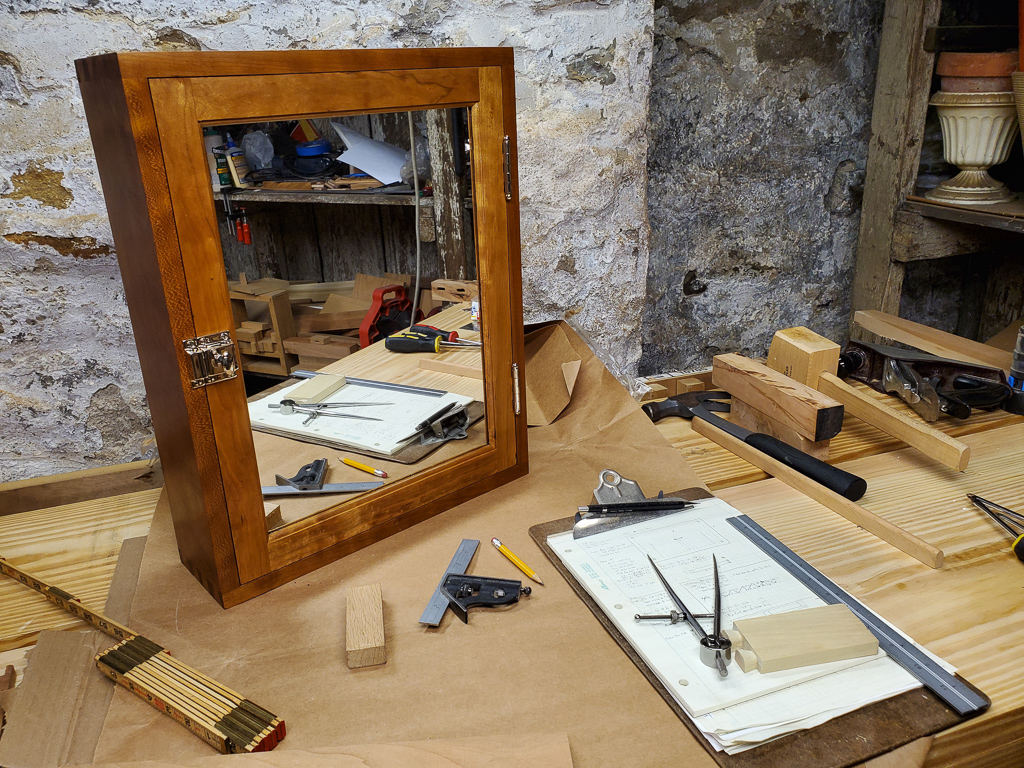
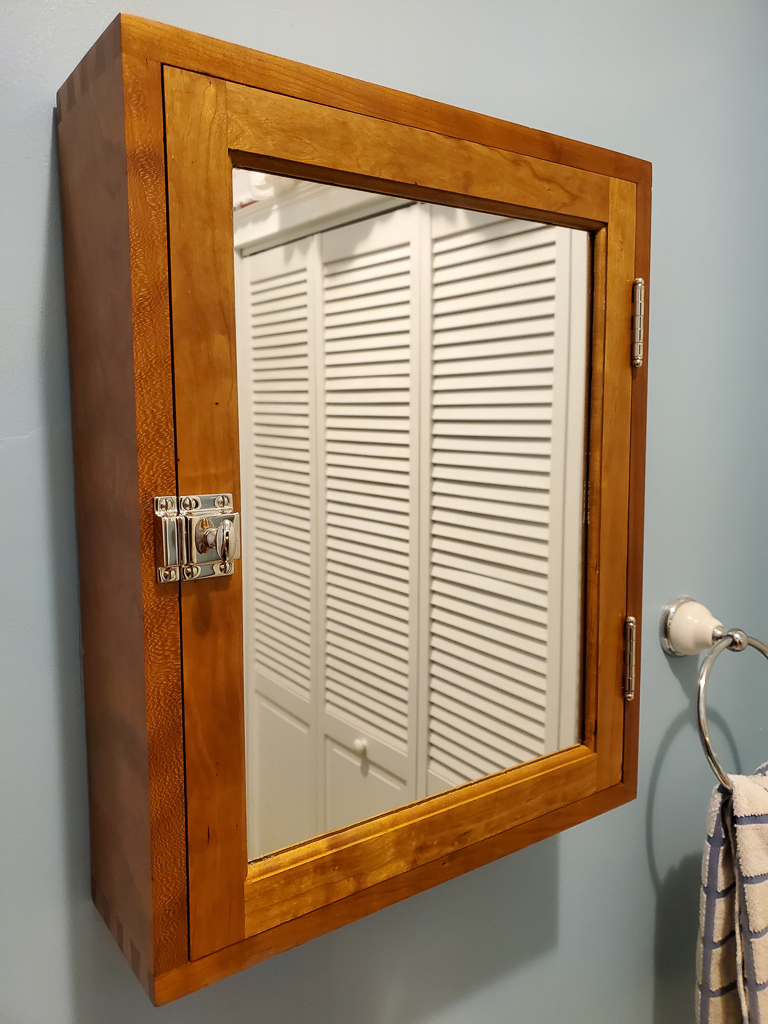
We never had a medicine chest on the first floor, using a bit of a kitchen cabinet instead for the things we kept handy downstairs. I decided this would be an excellent time to replace this crappy oval mirror that I never really liked with a medicine chest with a mirrored door.
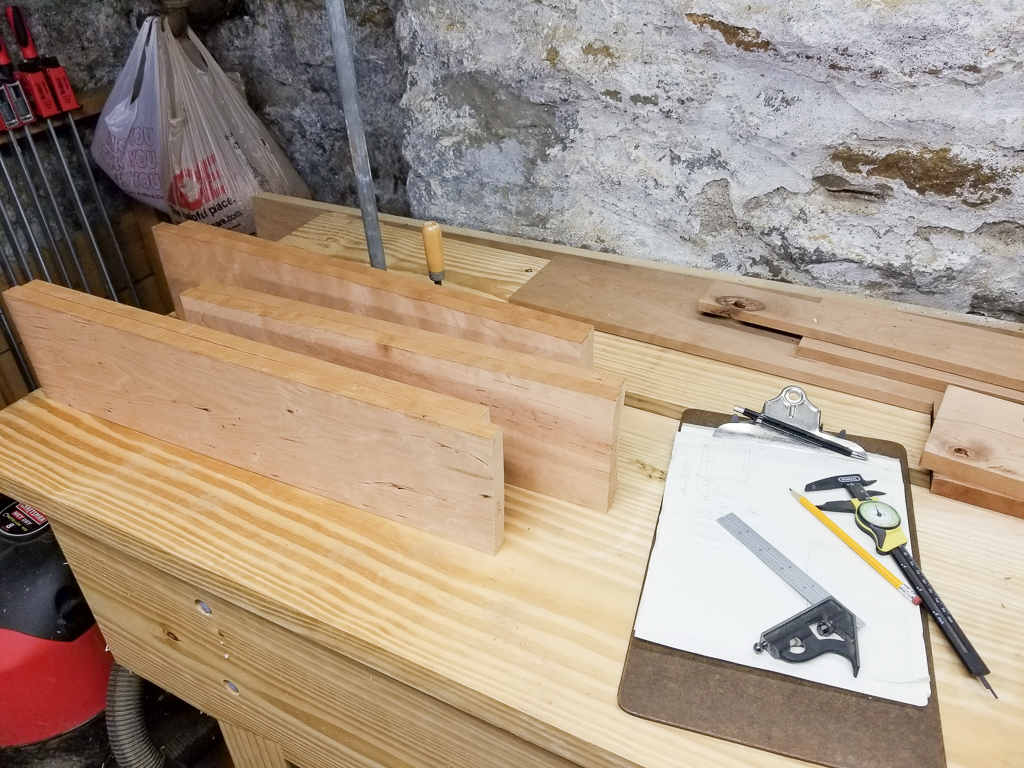
I began the woodworking for this project on November 3rd, 2018, after several friendly reminders from Jenny that she missed having a mirror in the first floor bathroom. I had a nice stock of Pennsylvania cherry, which I love to work and have used for several other small projects for the house. I had spent some time leading up to this working through a few design iterations, much to Jenny’s chagrin. I was working through the exterior dimensions, trying to make something that didn’t look like an enormous wall appendage, but also provided adequate storage for the stuff we’d want to put in it, and a nice mirror surface to use, while also ensuring enough room for Jenny’s rotating handsoap collection.
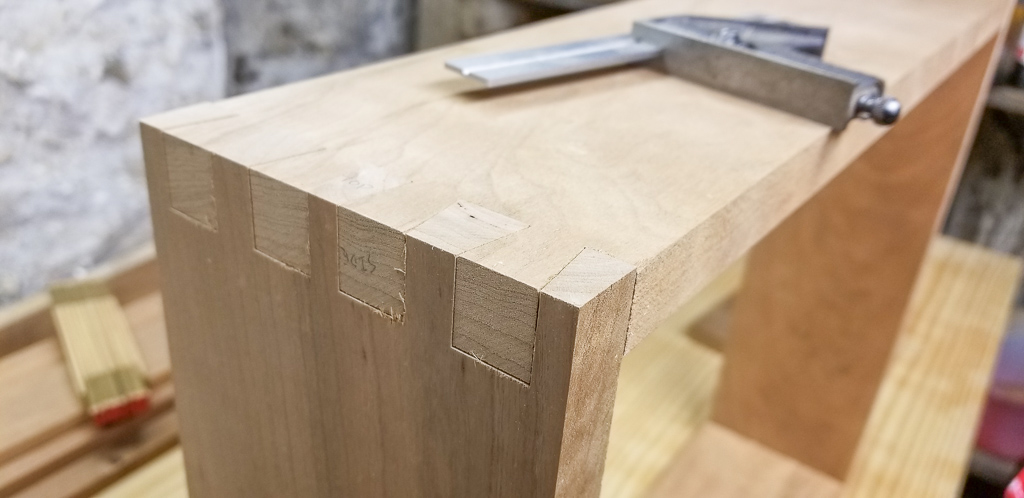
The following weekend, I refamiliarized myself with my Leigh dovetail jig, and cut some test dovetails for the case to get the settings dialed in again. Then the project sat for a month and a half, until in late January 2019 I had the case dovetails cut and dry fitted. Thing progressed pretty nicely after that, including milling the door parts with extended tenons to help deal with the extra weight of the mirror, marking and drilling for shelf pins, and then getting the case glued up.
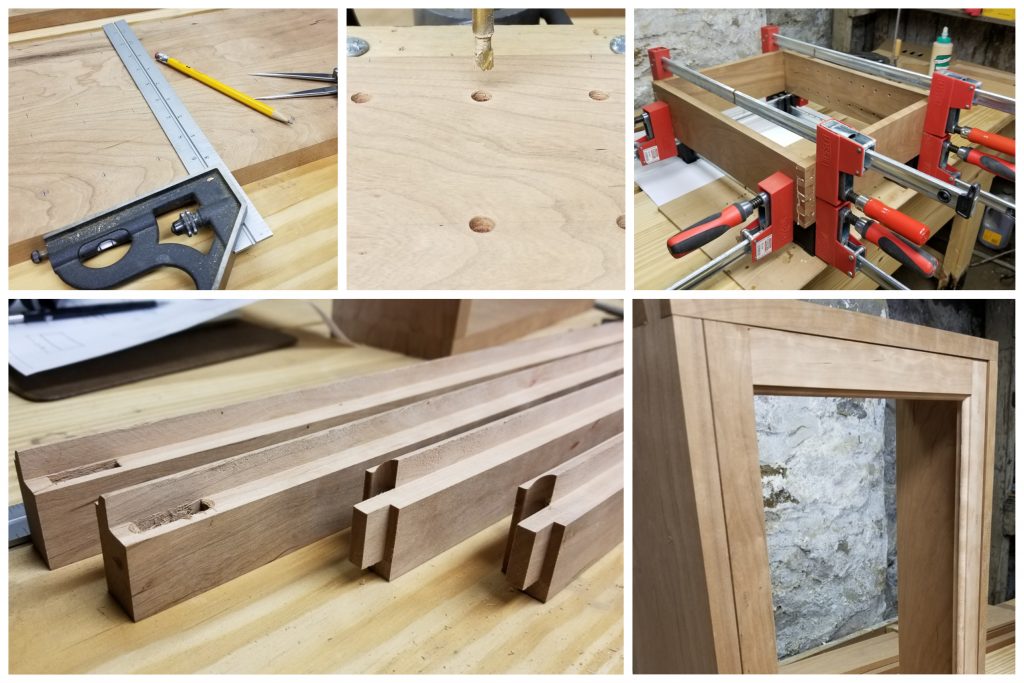
Then the project sat again for a little while. I finally got myself in gear over the winter and got the hinges mortised (with some help from Dandelion, of course, who loves being a shop cat, especially when I’m working with hand tools), drilled for the latch and test fitted it, and milled and installed the ship-lap back panel from some cherry that had some defects on one face. Since the cabinet was going to be secured through its back, I opted to use screws to secure the boards into the rabbet in the case. Unfortunately, I neglected to make sure my drill spots were clear, so there’s one set of shelf pin holes that are no longer usable, since they’ve got a big honking screw going through them now. Oops. Oh well. It can’t be seen, so only the next owners will figure out that I did an oops there if they go and try to put a shelf in that spot. Ha.
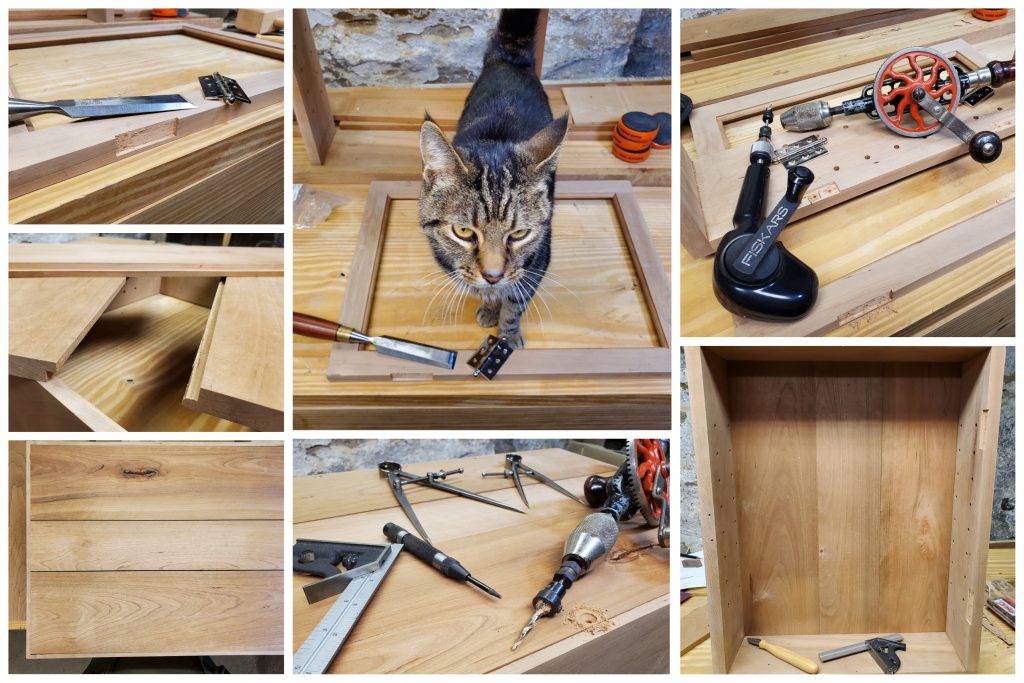
Finally, after stopping by the local glass shop for the mirror (Bellone’s Glass, a great local establishment), a lengthy finishing process (General Finishes Seal-A-Cel followed by several coats of Arm-R-Seal) interrupted several times by wet basement conditions, and finally putting it all back together again, it was ready to hang!
Of course, before I could actually hang this, I needed to patch the holes from the old mirror, and remove and patch the holes from the shelf that would have to move down by a few inches (and get centered correctly this time), and paint those patches. Fortunately, we happened to have a full gallon of that wall paint left over from the original work on the room, otherwise a match would have been difficult to impossible, and I would have ended up painting the whole wall. Yay for that.
I picked up a great little magnetic stud finder (StudPop), which works great on old plaster and lath walls to find nails, generally indicating a stud. I used it here to find the drywall screws that were securing the drywall to firring strips. Since this wall has no real studs (I have the photos somewhere of whatever the people who closed that off did, and it is kind of a mess), I wanted to at least get two screws into one of the firring strips, and then two more with butterfly anchors.
After all was said and done, the cabinet is on the wall. I had to make a choice between hanging it level and plumb, and hanging it so it looked level and plumb. I had to go with the former, though, because hanging it so it looked right caused the door to swing away when it was opened. That is less than ideal. So it is level, and it looks a little out of square by eye. Oh well. Old houses. But, we now have a medicine cabinet AND a mirror in the first floor bathroom! Win.
(Note that I took this photo before I could re-hang the shelf below it, as I needed a couple more anchors).
Finally getting this finished got me back into my shop again. I still have to work around the rains because the shop gets too wet to work, but this inspired me to get started on another project that I just finished today: A small desk for me to use when I’m working from home. Stay tuned for that write-up in the next week or so.


2 Comments
Pingback:
Pingback: